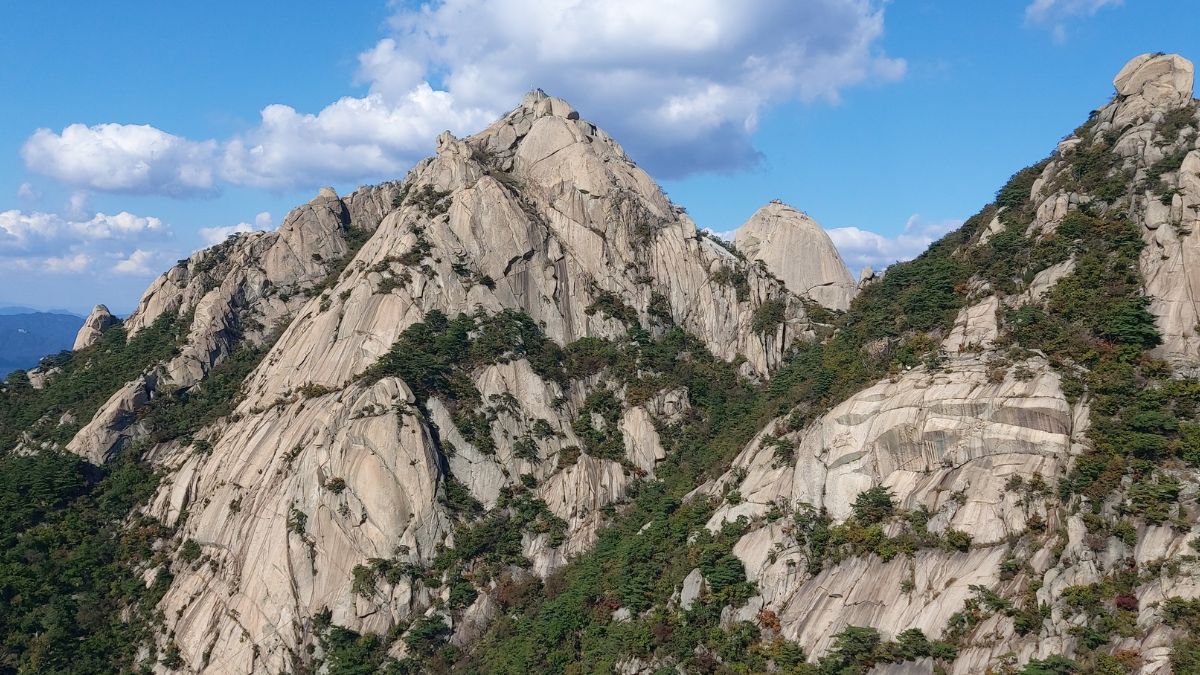
One subway ride from the center of Seoul puts you at the base of an 836-meter granite mountain. An hour and a half of hiking puts you on top of it. From the summit, you can see Lotte World Tower, Namsan, and the full spread of one of the world’s largest cities laid out beneath your feet.
Entry is free. You don’t need a car. You don’t need to own any gear. Everything you need to hike Bukhansan is available within five minutes of the subway station.
More than 70% of visitors to the Bukhansan Hiking Tourism Center are foreign nationals — not Korean locals — according to the Seoul Tourism Organization (2026). That number tells you something important: this isn’t a hidden local secret anymore. It’s one of Seoul’s best experiences, and an increasing number of travelers are building their entire trip around it. This guide tells you everything you need to know to get there and back without getting lost.
What Is Bukhansan — And Why Does It Feel Different From Any Other Mountain?
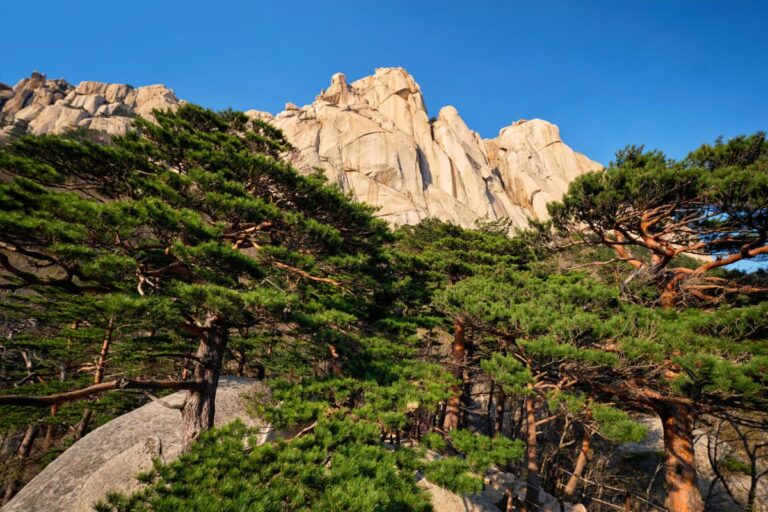
Bukhansan National Park sits on the northern edge of Seoul. Its highest point, Baegundae Peak (백운대, 836.5m), anchors a park that also includes Insubong (a world-class rock climbing wall), Mangyeongdae, and the Dobongsan area — all connected within a single national park boundary.
What makes Bukhansan genuinely unusual isn’t just the scenery. It’s the combination of things you don’t usually find in one place: rugged granite peaks, a Joseon-era mountain fortress with intact stone walls and gates, Buddhist temples dating back centuries, and a panoramic view of a city of ten million people — all accessible by public transport in under an hour from the center of a capital city.
Most major cities have parks. Very few have a mountain like this sitting inside them. That’s why foreign visitors consistently describe Bukhansan as the most unexpected thing about Seoul.
Essential Information — Check This Before You Leave
| Official name | Bukhansan National Park (북한산 국립공원) |
| Highest peak | Baegundae Peak (백운대) — 836.5m |
| Admission | Free |
| Entry hours (Mar–Nov) | 4:00 AM – 5:00 PM (last entry) |
| Entry hours (Dec–Feb) | 4:00 AM – 4:00 PM (last entry) |
| Hiking Tourism Center | 5-minute walk from Bukhansan Ui Station / Closed Mondays / Open 9 AM–6 PM |
| Gear rental | Hiking boots, poles, backpack, crampons — ₩2,000–5,000 per item |
| Center phone | 1533-2608 (English assistance available) |
| Official website | knps.or.kr (Korean and English) |
| Navigation | Naver Map or KakaoMap only — Google Maps does not support trail routing in Korea |
Important: Some trails are closed during fire prevention season (February 15 – May 15) and after heavy rainfall. Always check knps.or.kr before your visit to confirm trail availability on your planned date.
Getting There — Subway and Bus Are All You Need
For Baegundae Peak (the summit)
Option 1 — Bukhansan Ui Station (easiest) Take the Ui-Sinseol Line to its northern terminus, Bukhansan Ui Station (북한산우이역). From the station, walk approximately 2km through the Ui-dong area to reach the Baegundae Visitor Center (백운대탐방지원센터), where the main trails begin. The walk to the visitor center is flat and passes convenience stores and the Hiking Tourism Center — ideal for stocking up on water and snacks before you start climbing.
Option 2 — Gupabal Station + Bus Take Line 3 to Gupabal Station (구파발역), then board Bus 704 or Bus 34 toward the Bukhansanseong Entrance (북한산성 입구). This approach accesses the western side of the park and is the standard route for the Bukhansanseong Fortress trail. Check live bus arrival times on Naver Map before boarding — the interval between buses can vary.
For Dobongsan Area
Take Line 1 or Line 7 to Dobongsan Station (도봉산역), then walk 5–10 minutes to the park entrance. Signs are clear and the route is straightforward. The street between the station and the entrance is lined with hiking gear rental shops, convenience stores, and the makgeolli restaurants you’ll want to remember for the walk back down.
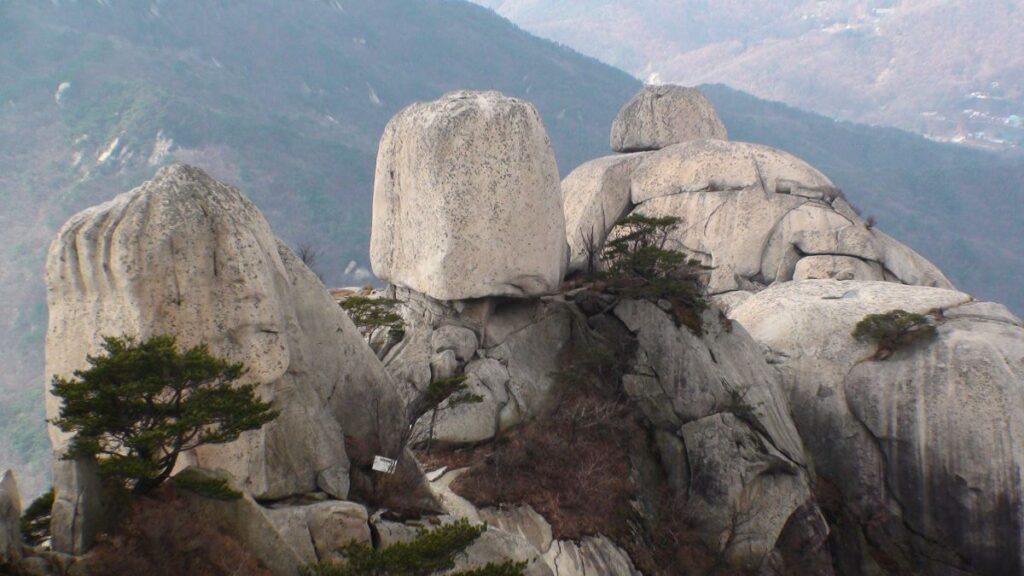
Trail Guide — Choose Based on Your Fitness and Goals
Trail 1 — Bukhansan Dulle-gil (둘레길) ★☆☆☆☆
Best for: Beginners, families, casual walkers Total distance: 71.5km circular (use any section you want) Time per section: 1–3 hours
The Dulle-gil is a loop trail that encircles the entire Bukhansan massif at low elevation. The path is almost entirely flat — wooden boardwalks and packed dirt trails — which means regular walking shoes are fine and the physical demand is minimal. You don’t choose a section and hike it all — you pick the part that suits your time and energy, walk as far as you want, and exit when you’re done. Ideal for anyone who wants to be in the forest without committing to a summit attempt.
Trail 2 — Baegundae Peak (백운대) ★★★☆☆
Best for: Most visitors, summit views, the classic Bukhansan experience Distance: Approximately 2km one way from the visitor center Time: 2.5–3.5 hours round trip Starting point: Baegundae Visitor Center (from Bukhansan Ui Station)
This is the one. The trail opens through mixed forest with stairs and smooth path, then transitions at mid-mountain into exposed granite — rough, textured rock that requires more attention underfoot. The final section before the summit involves fixed iron chains and rope handles set into the rock face. You will use your hands. It’s not technical climbing, but it’s not a walk either.
What you get at the top is worth the effort several times over. On a clear day, Lotte World Tower, Namsan Tower, and the full Seoul skyline stretch across the horizon. On very clear days, the Incheon coast is visible in the distance. The summit is a wide granite flat with room to sit, eat, and take in the view without rushing.
Before you go up:
- Hiking shoes or trail runners with real grip are non-negotiable. Wet granite in worn-out sneakers is genuinely dangerous.
- Carry at least 1.5–2 liters of water per person. There is nothing to buy between the visitor center and the summit.
- Work backward from the 5 PM entry cutoff when planning your departure time.
Trail 3 — Bukhansanseong Fortress Trail (북한산성) ★★★☆☆
Best for: History-focused visitors, cultural context alongside the hike Starting point: Bukhansanseong Visitor Center (Gupabal Station → Bus 704 or 34)
The Bukhansanseong trail follows the line of a Joseon-era mountain fortress — stone walls and gate towers built in the 18th century that still run across the ridgeline in remarkable condition. The hiking itself is comparable in difficulty to the Baegundae route, but the experience is different: you’re moving through landscape that has historical weight, passing Buddhist temples (Taegosa, Wonhyosa) tucked into the slopes and pausing at sections of fortress wall that frame the views below.
If your interest in Korea extends beyond the city to its longer history, this trail gives you both the physical experience of a proper mountain hike and genuine cultural content along the way.
Trail 4 — Dobongsan (도봉산) ★★★★☆
Best for: More experienced hikers, second or third Bukhansan visits, autumn foliage Starting point: Dobongsan Station (Line 1 or 7)
Technically a separate peak — 739.5m — but part of the same national park. The approach from Dobongsan Station follows a valley before the trail rises to a dramatically jagged granite ridgeline that’s more angular and exposed than the Baegundae area. Fewer foreign visitors come here, which means a noticeably more local atmosphere on the trail. The ridgeline looking back toward the valley is one of the best photography positions in the entire park — and in autumn, when the valley floor turns red and orange, it’s exceptional.
Save this one for your second visit. Come here when you already know how Bukhansan works and want to see a different side of it.
Seoul Hiking Tourism Center — The Service That Makes Everything Easier
The single biggest reason Bukhansan has become so accessible for foreign visitors is a small center five minutes from the subway station.
The Seoul Hiking Tourism Center — Bukhansan Branch provides everything a first-time visitor needs to hike without preparation:
- Gear rental: Hiking boots, trekking poles, backpacks, and crampons for ₩2,000–5,000 per item. You can show up from the airport in city clothes and leave properly equipped.
- Free guided hiking programs with English and Japanese guidance — check availability in advance by calling 1533-2608 or visiting the center on arrival.
- Trail maps and course descriptions available in English.
- Hours: 9 AM – 6 PM, closed Mondays.
In 2025, 98.31% of foreign visitors who used the center rated their experience as “very satisfied.” (Source: The Kyunghyang Shinmun, February 20, 2026) The combination of low gear rental cost and English-capable staff removes almost every logistical barrier that might otherwise make this mountain feel inaccessible.
When to Visit — A Season-by-Season Guide
| Season | What to expect | Rating |
|---|---|---|
| Spring (Mar–May) | Azaleas and cherry blossoms on the lower slopes, clear visibility, peak season. Note: some trails closed Feb 15–May 15 for fire prevention — always check before going | ★★★★★ |
| Summer (Jun–Aug) | Hot and humid in the city, but the mountain itself is noticeably cooler. Start before 7 AM to beat the heat and the weekend crowds | ★★★☆☆ |
| Autumn (Sep–Nov) | Peak foliage mid-to-late October, sharp clear skies, exceptional visibility from the summit. Tied with spring as the best season | ★★★★★ |
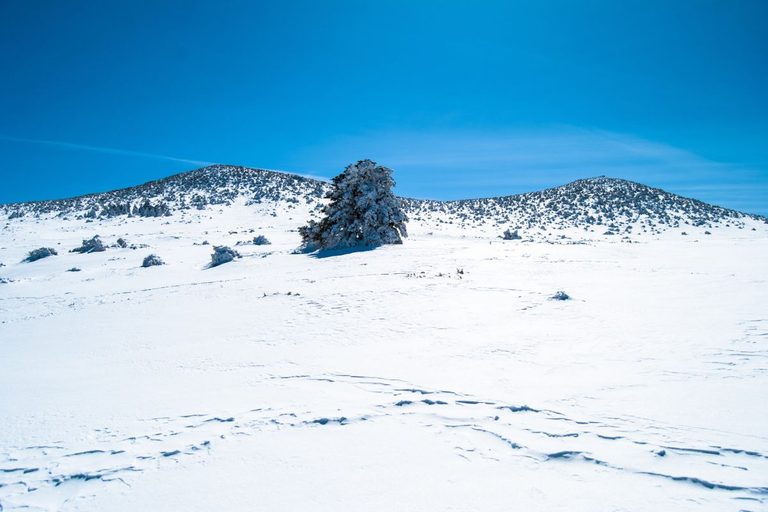
| Winter (Dec–Feb) | Snow on granite looks extraordinary. Crampons are essential and available for rental. Entry cutoff is 4 PM, so start early | ★★★☆☆ |
Best single time to visit: Weekday mornings before 9 AM in any season. Weekend mornings after 10 AM on Baegundae can get genuinely crowded at the summit.
5 Mistakes First-Time Visitors Make
① Wearing the wrong shoes
The final section of Baegundae is sloped granite slab. In dry conditions, most shoes grip adequately. After rain or on humid mornings, smooth-soled sneakers and sandals become a real hazard. Hiking shoes or trail runners with proper grip are required. If you don’t have them, rent from the Hiking Tourism Center before you start — it takes ten minutes and costs less than a coffee.
② Not bringing enough water
There is nowhere to buy water between the visitor center and the summit. On a warm day, the round trip to Baegundae takes three to four hours. Carry at least 1.5 to 2 liters per person. The convenience store at Bukhansan Ui Station is your last chance — use it before you start walking toward the trailhead.
③ Not knowing the entry cutoff time
The national park closes entry at 5 PM (4 PM in winter). Starting too late means rangers will turn you back before the summit or ask you to descend mid-trail. Work backward from the entry cutoff when planning: the Baegundae round trip takes 2.5–3.5 hours, which means your latest reasonable departure from the visitor center is around 1:30 PM in summer and noon in winter.
④ Using Google Maps for trail navigation
Google Maps does not provide hiking trail routing in South Korea due to local mapping restrictions. Hikers who rely on it have ended up on wrong paths or taken significantly longer routes. Install Naver Map or KakaoMap before you leave your accommodation. Both apps have English interfaces and show accurate trail paths, estimated hiking times per section, and real-time trail closure information.
⑤ Skipping the post-hike makgeolli and pajeon
After descending, the restaurants near the park entrance serve makgeolli (fermented rice wine, slightly sweet and milky, served in a ceramic bowl) and pajeon (savory Korean pancake, typically filled with seafood or kimchi). This pairing is so deeply embedded in Korean hiking culture that it has its own name and its own ritual. Foreign visitors who skip it consistently say afterward that they wish they hadn’t. It costs around ₩10,000–15,000 for two people and it’s the right way to end a day on this mountain.
Sample Day Plan — Baegundae Half-Day
08:00  Arrive at Bukhansan Ui Station
08:05  Convenience store — buy 2L water, kimbap or energy bars
08:15  Hiking Tourism Center — rent boots or poles if needed
08:30  Depart Baegundae Visitor Center, begin the climb
10:30  Reach Baegundae summit — rest, eat, take in the view
11:30  Begin descent
13:00  Return to visitor center
13:15  Walk to nearby restaurant — makgeolli and pajeon
14:30  Head back to Bukhansan Ui Station
15:00  Subway back to central Seoul
This schedule works comfortably within all seasonal entry restrictions and leaves the afternoon free for other activities in the city.
Complete Pre-Hike Checklist
- Install Naver Map or KakaoMap before leaving your accommodation (Google Maps trail routing doesn’t work in Korea)
- Check knps.or.kr for trail closures or fire prevention restrictions on your planned date
- Hiking shoes with proper grip — bring your own or plan to rent at the center (₩2,000–5,000)
- Water: 1.5–2 liters per person — buy at the convenience store near Bukhansan Ui Station
- Snacks — kimbap, nuts, energy bars; nothing is sold on the trail
- Light windbreaker or thin layer — the summit is noticeably colder than the city below, even in summer
- Plan your departure time against the entry cutoff (5 PM Mar–Nov, 4 PM Dec–Feb) — allow 3 hours for Baegundae round trip
- Save the Hiking Tourism Center number: 1533-2608 (English spoken)
- Small amount of cash — ₩10,000–20,000 for gear rental and the post-hike restaurant
- Post-hike restaurant — build it into your route on the way back to the station
One Last Thing
If someone asked me to choose one thing in Seoul that genuinely surprises people — the experience they didn’t expect and remember longest — I’d say Bukhansan without hesitating.
You take the subway. You walk for ninety minutes. Seoul appears beneath you. No ticket, no tour, no car, no guide required.
Bukhansan is what Koreans do on weekends. Getting mixed into that crowd on a Saturday morning, arriving at the summit alongside people who have been coming here for years, sitting down on warm granite with a view that feels impossible from a capital city — and then finishing the day with makgeolli at a wooden table near the trailhead — that’s K-hiking. That’s the version of Seoul most visitors don’t find until they’ve already left.
Install Naver Map, pack water, and head to Bukhansan Ui Station. The mountain handles everything else.
For more local guides to getting the most out of Seoul, check the related posts below.